Background
I have been struggling to create my GitHub page for quite some times already.
So, this is not my “First” experience with GitHub page per se, but this IS the first time I got it working as expected.
Why a long time ?
Well, I always got stuck when I got to customizing my pages. With all the folders given, I have no idea how it works and which one to edit. Also, with all the tutorials out there, you can confused easily.
But after reading a post by ZhgChgLi, 無痛轉移 Medium 到自架網站, I have a better understanding.
Yes, it’s in Chinese, but let me do my best to share what I have learned from that post so far.
Just so you know, my tutorial is a slight different from the one from the official
So make your own choice and use the other as a reference.
Start-up a GitHub Page
In order to create a GitHub page, you need to create a repository on GitHub with the given format
{github_username}.github.io
Next, you can choose to use main or another branch, along with a directory (/doc or /root) as the source of your GitHub page.
This can be done by going to the Settings page on GitHub.
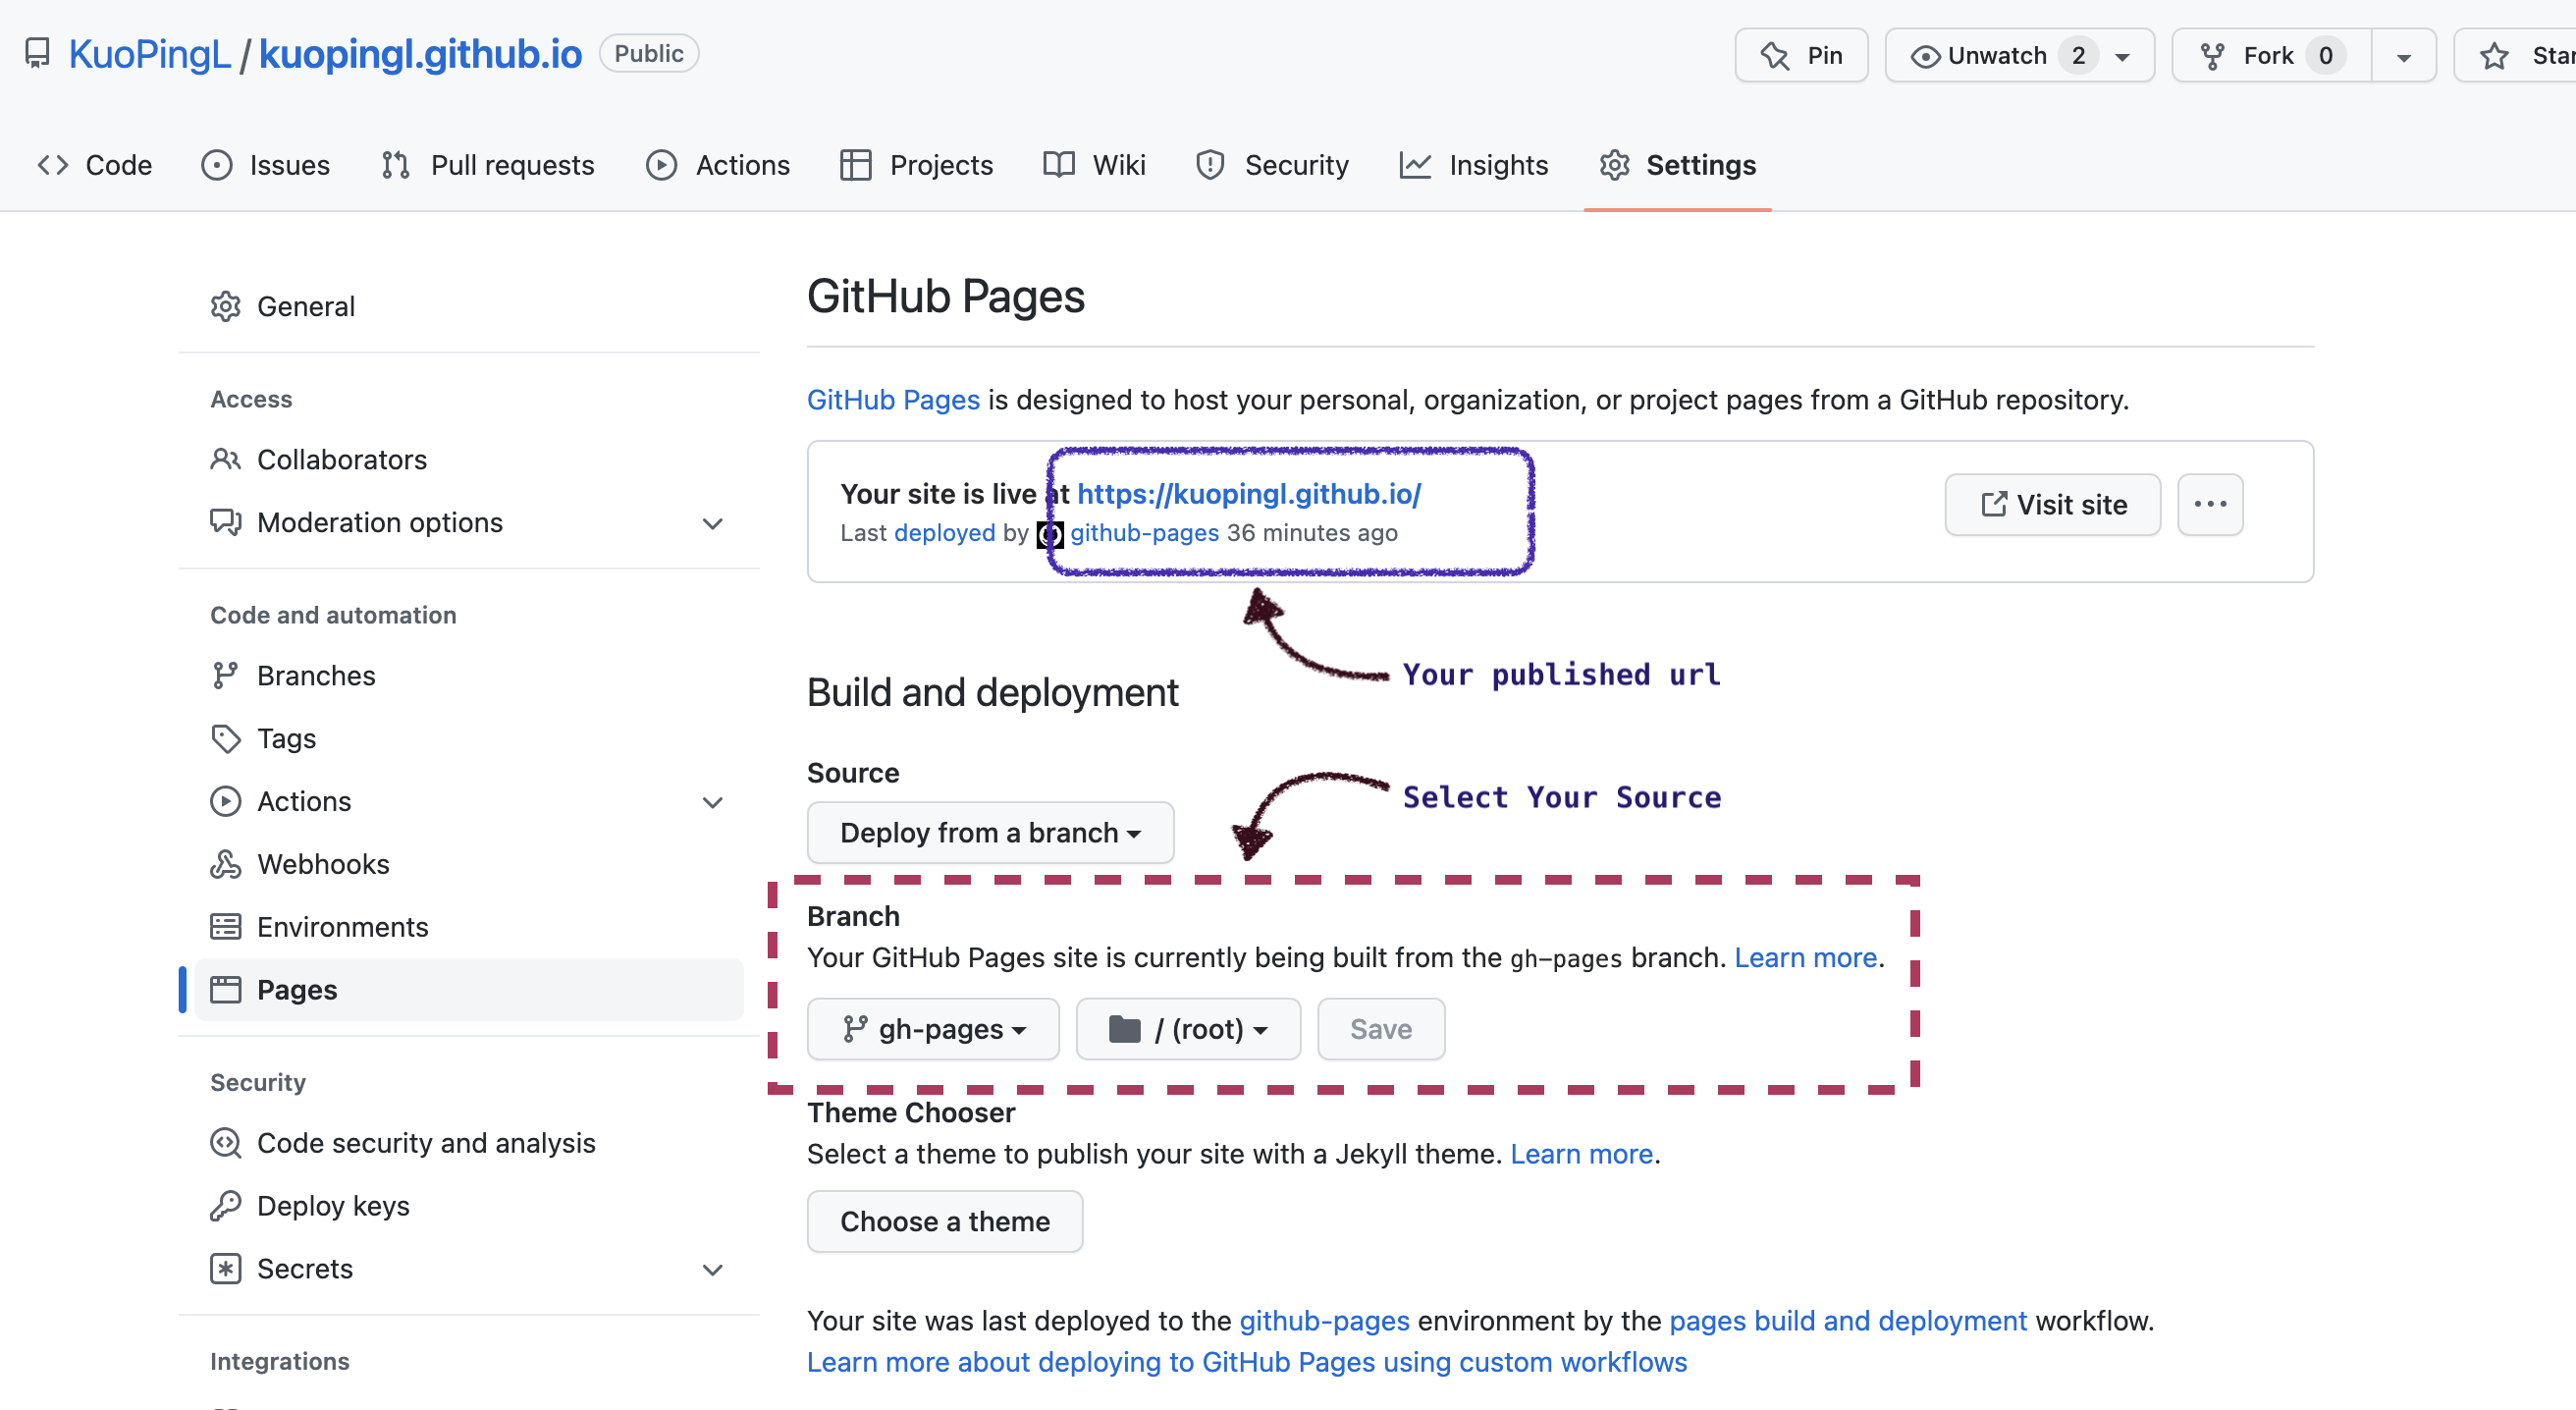
Now if you go to your published page, you should see the default content provided by GitHub.
Let’s create our first page.
Create index.html
In order to display something on your page, you can simply create an index.html, with the following code, at the root of the branch.
<!DOCTYPE html>
<html>
    <head>
        <title>Example</title>
    </head>
    <body>
        <p>Hello World</p>
    </body>
</html>
After reloading the GitHub page, you should be able to see “Hello World” in it.
I know this looks very dull and plain, we will spice it up later.
But first, we need to get our gears ready.
Prerequisite
Here are the thing we need to install, just follow their official tutorials and everything should be ready to go :
- Jekyll
Jekyll is a static site generator written in
Ruby.
With built-in support for GitHub Pages and a simplified build process,
Jekyll can generate our site usingmarkdownandHTMLfiles. - Ruby
In order to install Jekyll, we need to make sure our computer understands it, so first we need to install Ruby.
Simply follow the instructions from the Ruby official and make sure the version installed is2.5.0 or higher.Check your version using
ruby -v - GCC
You might run into error stating that you need to install GCC before installing Ruby, since some Gems (framework) need to use native C extension.
Check your version using
gcc -v,g++ -v - RubyGems
Next, we need to install RubyGems, a package management framework for Ruby, to help us install Jekyll.
Check your version using
gem -v - Make
Finally, we also need to install Make, a tool which controls the generation of executables and other non-source files of a program from the program’s source files.
In another word, it helps us to build program based on the instructions from a file called the makefile.Check your version using
make -v
Now that everything is ready, let’s pick your theme.
Select your theme
You can find a list of resources at Jekyll site.
Let’s take the following theme for example, the theme I have chosen is created by mzlogin.
In order to implement the theme, we can do it in two ways.
If you haven’t created your repository :
You can simply go to the theme’s GitHub and select the
Use this templatebutton and clone it to your new repository.
Otherwise:
you need to clone or download the codes from GitHub into a separate folder. Then, you can replace your GitHub page clone folder with the contents from the selected theme.
You may now push the new contents to your GitHub and you can refresh your GitHub page to see your new contents.

Understand the theme
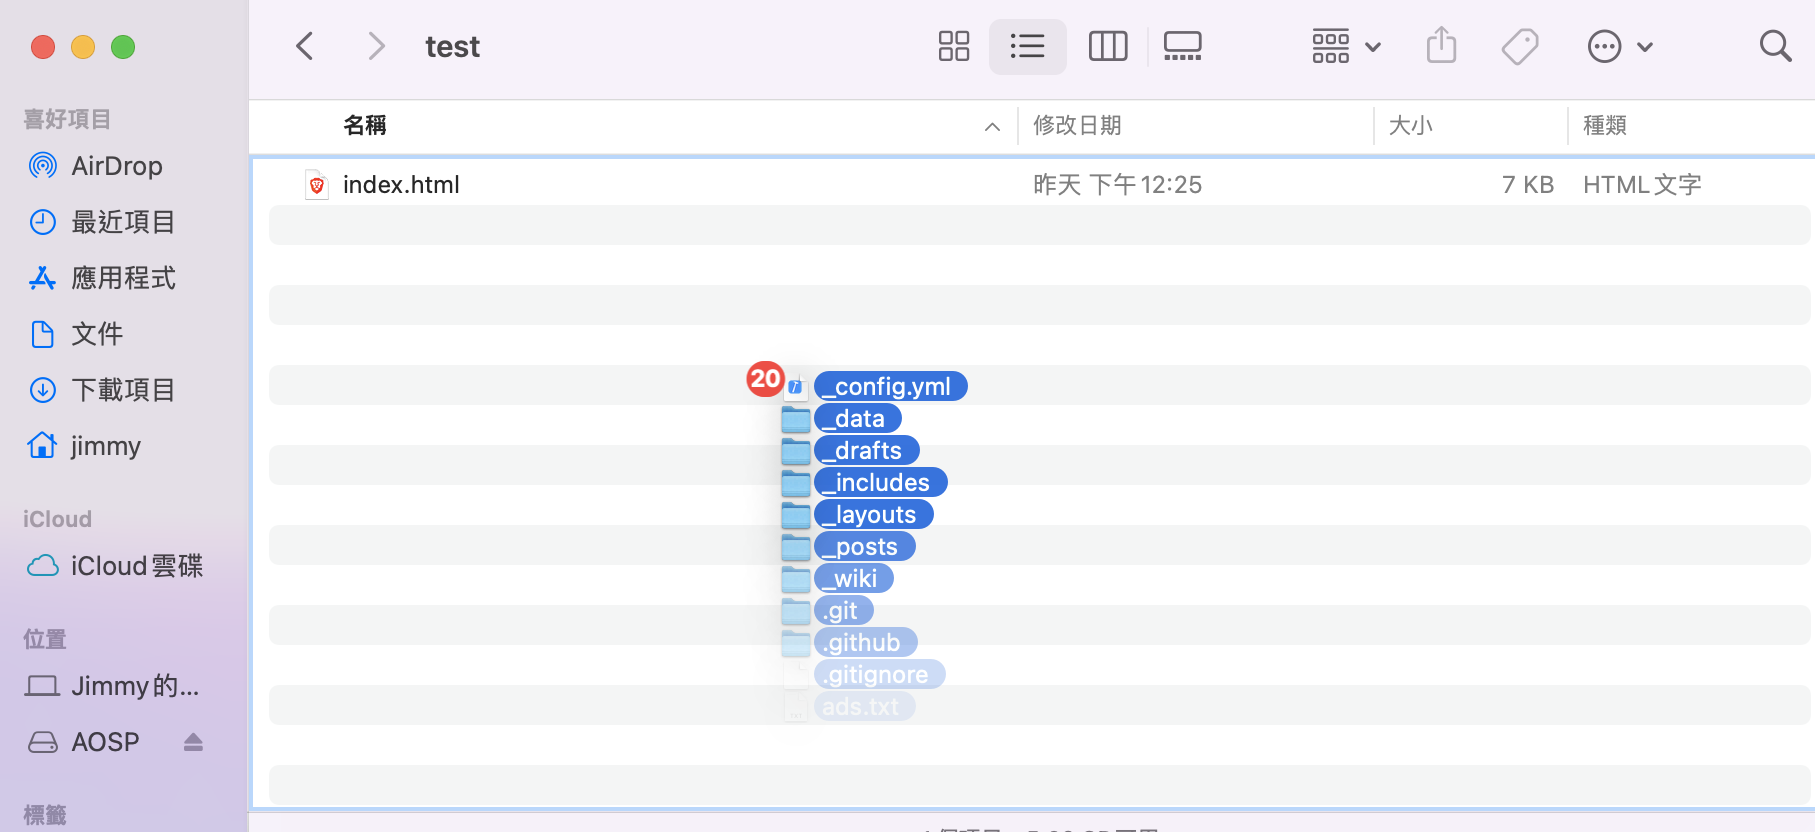
Now that you have created your first GitHub page, let’s take some time to understand the what these folders and files are.
github_username.github.io
| folder/file | description |
|---|---|
| _data | this folder contains info that is written in YAML language, which can be read by markdown files. for example, if you wish to read variable from the social.yml file under _data we can write{ % for link in site.data.links % } |
| _includes | a folder that contains layouts that are commonly used in multiple page |
| _layouts | a folder that contains layouts for different purposes such as page, post, categories. |
| _posts | a folder that contains the contents of your posts in markdown format. |
| _{others} | you can also make other folders that serves similar purposes, including layout, data and content |
| assets | a folder that contains css, images, js and third parties libraries that will be used in your page. Images that will be used in your posts will be placed in images folder. |
| images | a folder that contains images for your posts. Usually, they will be sorted in subfolders under different categories and named using the post title. |
| pages | a folder containing markdown files that describes the contents of permanent pages, such as 404, about, categories etc. |
| _config.yml | Main configuration in YAML |
| CNAME | contains your custom domain for your Jekyll page. |
| Gemfile | A Gemfile is a file we create which is used for describing gem dependencies for Ruby programs.[ref]. Remember to call bundle install when you update this file to update Gemfile.lock |
| Gemfile.lock | This is a file that is generated after calling bundle install. It allows you to specify the versions of the dependencies that your application needs in the Gemfile, while remembering all of the exact versions of third-party code that your application used when it last worked correctly. [ref] |
| index.html | The HTML responsible for your home page |
Now you understand the folders, let’s try to create a post.
Creating a post
Naming Convention
When creating your post, you need to be aware of its naming syntax, because it will determine where Jekyll will placed the converted file at.
In our case, the naming syntax is YYYY-MM-DD-{name}.markdown.
With this naming syntax, the generated html will be placed at:
_site > YYYY > MM > DD > {name}.html
Post Style
As for the content of the post, it should consisted of top and bottom sections.
At the top, it should contain properties similar to the followings at the top:
---
layout: post
title:  "GitHub Page - First Experience"
date:   2022-08-07 17:08:28 +0800
categories: [jekyll, github-page]
---
These properties means the followings:
- layout : this markdown will use the post.html in
_layoutsfolder - other properties : these properties can be accessed in the post.html using Liquid language.
After stating the properties, you can now start typing your content of your post.
If you wish to know how to type markdown, checkout kramdown.
That’s about it.

Local Server
WAIT ~~~
So far, every time you wish to see the result, you will probably need to upload to your GitHub.
After a few uploads, you might be wondering
“Do I need to upload to GitHub every time I wish to see the result ?”
Well, no, you can build the site and make it available on a local server by simply entering the following code in your terminal :
bundle exec jekyll serve
About Post
- Author:Jimmy Liu
- Link:https://kuopingl.github.io//2022/08/07/github-page-first-experience/
- Copyright:Free to share and adapt, but remember to give proper credit(CC BY-SA 3.0)