你是否也想要使用 CI/CD 卻不知道從何下手呢? 那不如跟著我一同從 GitLab 學習 CI/CD 吧。
PS: 這個系列會從 GitLab、 Docker、 Jenkins、 GitHub Action、 Kubernetes、 Fastlane 的運用。 想當然這會是一個漫長的系列,所以請耐心等待。
序言
如果你還不知道什麼是 CI/CD? 他們分別是以下的縮寫 :
- CI(Continuous Integration)持續整合
- CD(Continuous Deployment)持續部署
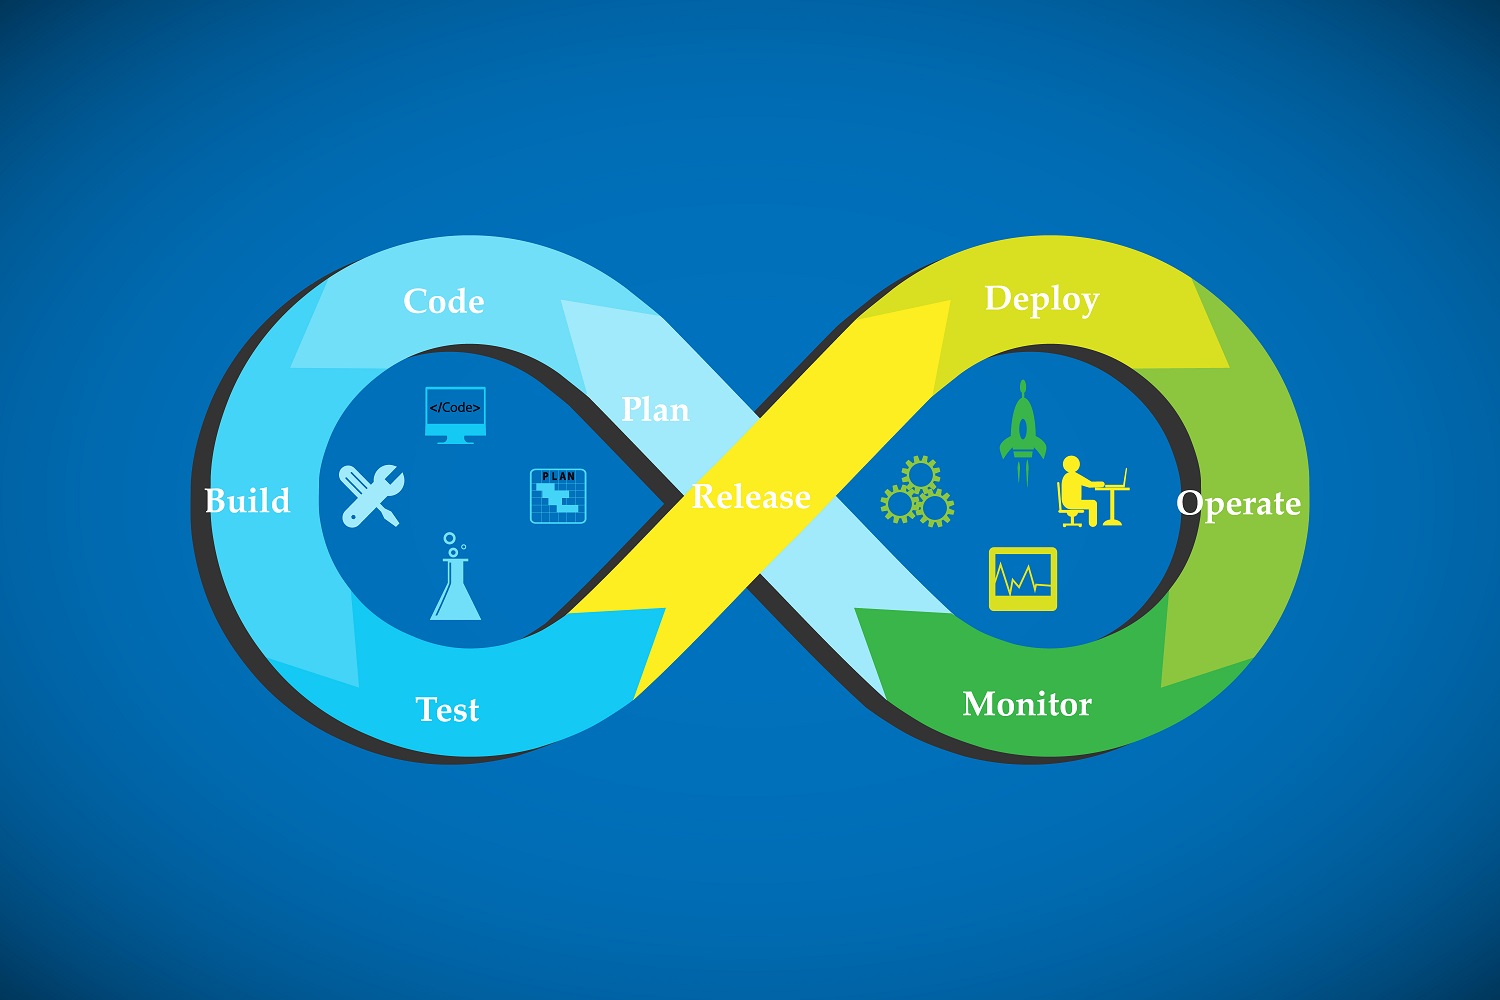
所謂的「整合」– 藍色的流程 – 指的是開發過程中的「測試與上傳」。 通過不斷地將測試過的代碼上傳至 Repository (儲存庫) 我們可以更新與整合代碼。雖然這個行為很簡單,但在人為操作下多少還是會出現錯誤,像是忘記進行某些測試,如此一來我們就無法保證代碼的品質。
「部署」– 剩下的流程 – 其實就是將應用程式打包、上傳至 Store 或傳送給指定的人並監控操作時出現的錯誤狀況。當然,我們也希望這些行為都能自動化。 監控的部分可以通過 Firebase Analytics,而其他的行為也是可以通過腳本進行。
此時我們有以下兩種選擇 :
- 本地端編寫腳本。 雖然這方法可行,但每個人的腳本也許會有些不同,也就無法保證測試品質。
- 讓腳本中央化。 如此一來就解決腳本不同的問題了。
有了共同腳本,接下來就是需要一個自動化的行為。 我們需要在團隊上傳代碼時自動運行腳本。 這個行為可以交由 GitLab、 GitHub Action 和 Jenkins 來進行。 為了確保測試環境的一致,我們需要使用到 Docker。 Docker 會通過 Image 建立一個或多個 Container aka 測試環境,像是系統、環境變數、工具 等等都可以進行安裝。
通過多個工具的配合我們便可以將 CI/CD 自動化了。
為何選擇 GitLab ?
答案其實很簡單, 因為 GitLab 做了很多我們原本需要做的事,所以相對的容易上手。 雖然對其他平台也有做過一些研究,但我對他們還不夠暸解所以無法給出能說服我自己的評語。
不過我相信通過不斷地去學習,我們最後也會有自己的看法的。 廢話不多說,我們直接開始吧。
這篇,我們將會專注在最基本的 CI/CD 設定並暸解其中的行為。 這些都是為了奠定一定的基礎知識,好讓我們在之後的系列中不會喘不過氣來。

另外,這是 GitLab 的 收費表格。 這篇中我們使用的是 Cloud Free 版本。為了讓我們真正財務自由,之後會改成 Self Managed 版本。
GitLab 起手式
創建並上傳專案
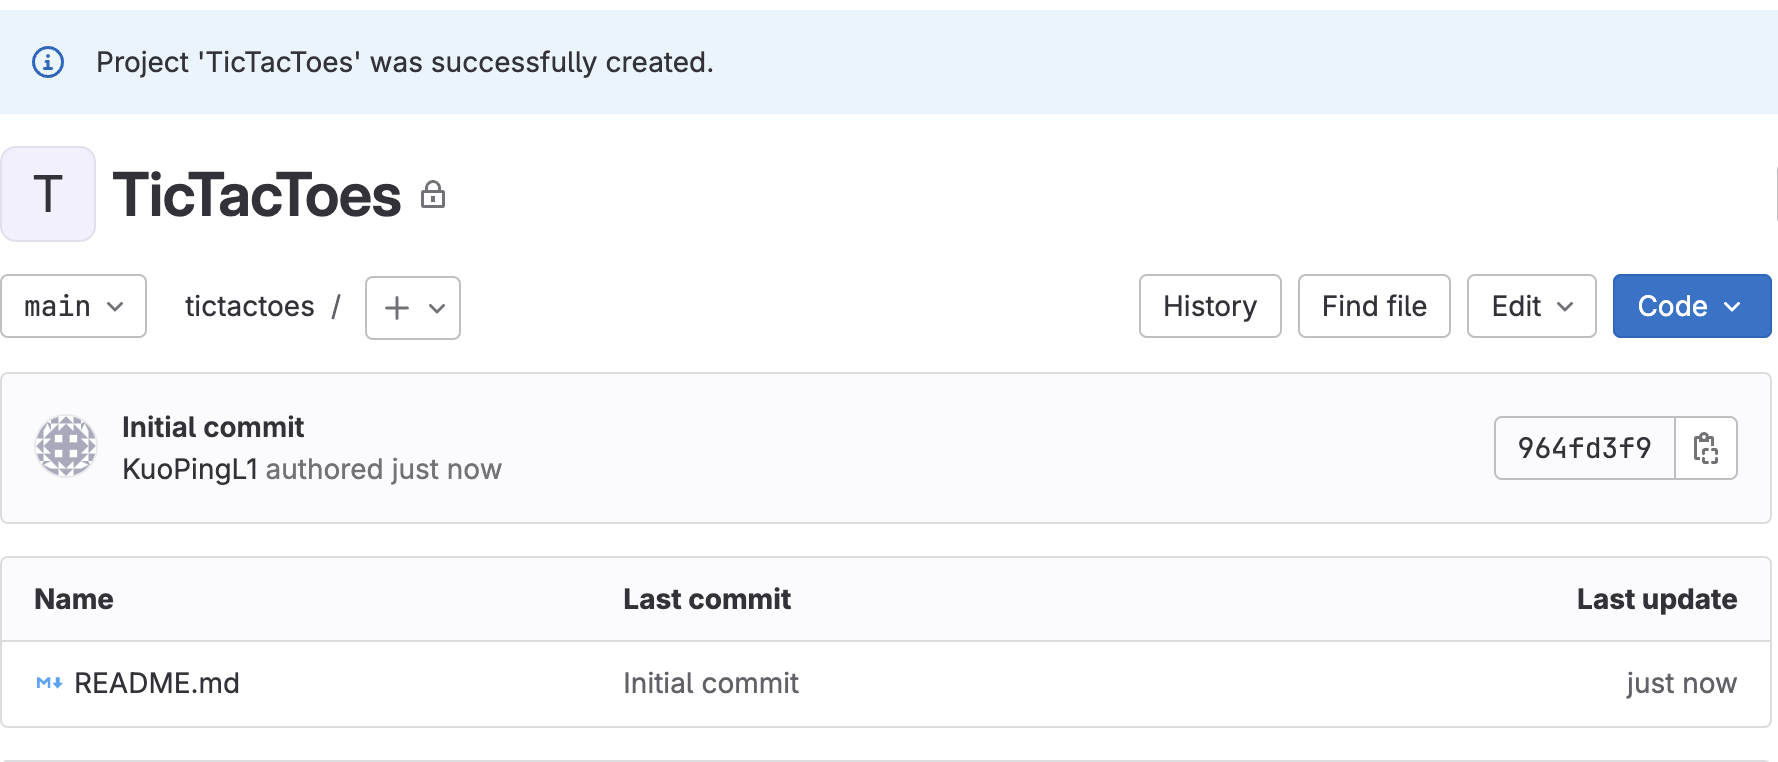
首先我們在 GitLab 上創建一個專案 :

這裡我們建立了一個只有 README 的專案,不要選擇 Enable Static Application Security Testing (SAST)。
然後我們先將我們創建的 Android 專案推上去 :
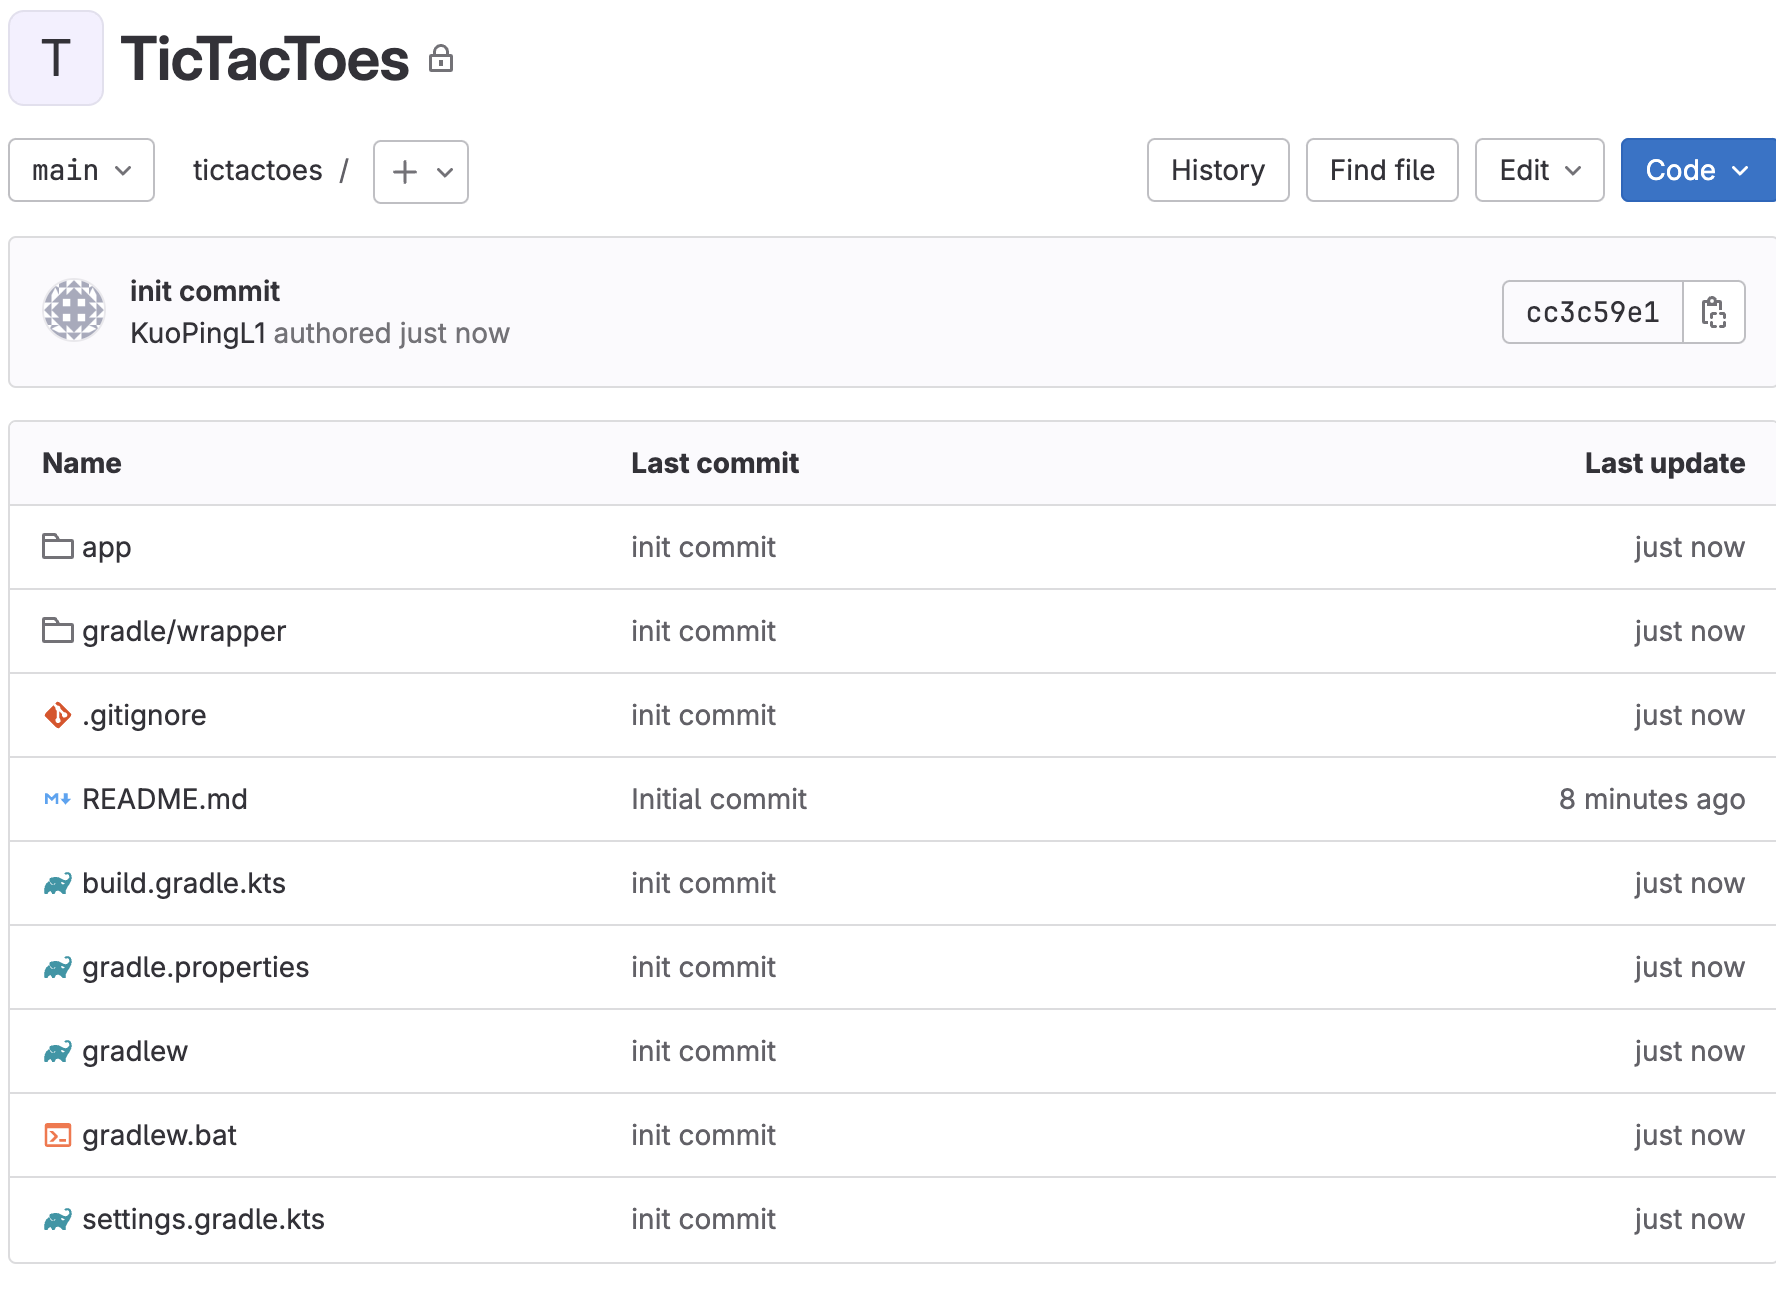
接下來如果我們想要使用 GitLab 的 CI/CD 服務就需要定義一個 YAML 檔案。
新增 .gitlab-ci.yml
如果我們想要使用 CI/CD,我們就需要加入一個 .gitlab-ci.yml 檔案。
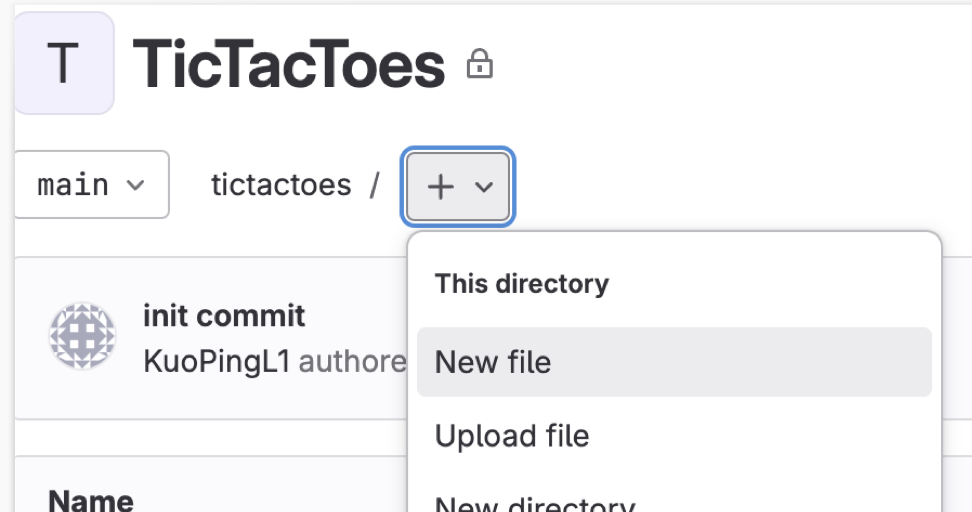
他的名稱可以不同,但這個名稱是較為常用,而且是會被 GitLab 自動認出。

選擇 Template
因為 GitLab 認得出 .gitlab-ci.yml 所以他會顯示 add template 的選項。 這裡我們選擇了 Android,然後就會看到 :
# This file is a template, and might need editing before it works on your project.
# To contribute improvements to CI/CD templates, please follow the Development guide at:
# https://docs.gitlab.com/ee/development/cicd/templates.html
# This specific template is located at:
# https://gitlab.com/gitlab-org/gitlab/-/blob/master/lib/gitlab/ci/templates/Android.gitlab-ci.yml

# Read more about this script on this blog post https://about.gitlab.com/2018/10/24/setting-up-gitlab-ci-for-android-projects/, by Jason Lenny
# If you are interested in using Android with FastLane for publishing take a look at the Android-Fastlane template.

image: eclipse-temurin:17-jdk-jammy

variables:
  # ANDROID_COMPILE_SDK is the version of Android you're compiling with.
  # It should match compileSdkVersion.
  ANDROID_COMPILE_SDK: "33"

  # ANDROID_BUILD_TOOLS is the version of the Android build tools you are using.
  # It should match buildToolsVersion.
  ANDROID_BUILD_TOOLS: "33.0.2"

  # It's what version of the command line tools we're going to download from the official site.
  # Official Site-> https://developer.android.com/studio/index.html
  # There, look down below at the cli tools only, sdk tools package is of format:
  #        commandlinetools-os_type-ANDROID_SDK_TOOLS_latest.zip
  # when the script was last modified for latest compileSdkVersion, it was which is written down below
  ANDROID_SDK_TOOLS: "9477386"

# Packages installation before running script
before_script:
  - apt-get --quiet update --yes
  - apt-get --quiet install --yes wget unzip

  # Setup path as android_home for moving/exporting the downloaded sdk into it
  - export ANDROID_HOME="${PWD}/android-sdk-root"
  # Create a new directory at specified location
  - install -d $ANDROID_HOME
  # Here we are installing androidSDK tools from official source,
  # (the key thing here is the url from where you are downloading these sdk tool for command line, so please do note this url pattern there and here as well)
  # after that unzipping those tools and
  # then running a series of SDK manager commands to install necessary android SDK packages that'll allow the app to build
  - wget --no-verbose --output-document=$ANDROID_HOME/cmdline-tools.zip https://dl.google.com/android/repository/commandlinetools-linux-${ANDROID_SDK_TOOLS}_latest.zip
  - unzip -q -d "$ANDROID_HOME/cmdline-tools" "$ANDROID_HOME/cmdline-tools.zip"
  - mv -T "$ANDROID_HOME/cmdline-tools/cmdline-tools" "$ANDROID_HOME/cmdline-tools/tools"
  - export PATH=$PATH:$ANDROID_HOME/cmdline-tools/latest/bin:$ANDROID_HOME/cmdline-tools/tools/bin

  # Nothing fancy here, just checking sdkManager version
  - sdkmanager --version

  # use yes to accept all licenses
  - yes | sdkmanager --licenses > /dev/null || true
  - sdkmanager "platforms;android-${ANDROID_COMPILE_SDK}"
  - sdkmanager "platform-tools"
  - sdkmanager "build-tools;${ANDROID_BUILD_TOOLS}"

  # Not necessary, but just for surity
  - chmod +x ./gradlew

# Basic android and gradle stuff
# Check linting
lintDebug:
  interruptible: true
  stage: build
  script:
    - ./gradlew -Pci --console=plain :app:lintDebug -PbuildDir=lint
  artifacts:
    paths:
      - app/lint/reports/lint-results-debug.html
    expose_as: "lint-report"
    when: always

# Make Project
assembleDebug:
  interruptible: true
  stage: build
  script:
    - ./gradlew assembleDebug
  artifacts:
    paths:
      - app/build/outputs/

# Run all tests, if any fails, interrupt the pipeline(fail it)
debugTests:
  needs: [lintDebug, assembleDebug]
  interruptible: true
  stage: test
  script:
    - ./gradlew -Pci --console=plain :app:testDebug
這個只是一個模板,我們還需要進行簡單的修改。
如果你使用別的名稱,你也可以在 這裡 找到你所需要的模板。
更新 variables
這部分定義了這個 yml 的 全域變數
variables:
  ANDROID_COMPILE_SDK: "33"
  ANDROID_BUILD_TOOLS: "33.0.2"
  ANDROID_SDK_TOOLS: "9477386"
這三個參數都需要進行修改。 首先,我們需要將 ANDROID_COMPILE_SDK 與我們 build.gradle 中的 compileSdkVersion 或 build.gradle.kts 中的 compileSdk 一致。
然後需要在 AS 中設定目前專案使用的 ANDROID_BUILD_TOOLS (預設是最新)。 我們可以從兩個地方進行設定 :
- 在 AS 點擊
File > Project Structure > Modules並選擇所需要的版本。 選擇哪個可以參考 官方。 - 直接在
build.gradle中的android定義buildToolsVersion "33.0.2"或你想要的版本。
最後我們需要指定 ANDROID_SDK_TOOLS 版本,這個是 Command Line Tool 的版本。 我們可以通過註解中的 官方網站 在最下方找到目標版本號碼。 Command Line Tool 的名稱會有以下格式 :
# commandlinetools-{PlatForm}-{Version}_latest.zip
commandlinetools-mac-10406996_latest.zip
此時我看到的是 10406996。 所以最後 variables 變成 :
variables:
  ANDROID_COMPILE_SDK: "34"
  ANDROID_BUILD_TOOLS: "33.0.1"
  ANDROID_SDK_TOOLS: "10406996"
修改後就可以推上去了。
如果有對專案進行修改,要記得將 local 與 remote 的專案都更新一次才行。
現在我們就已經完成簡單的 CI/CD 設定了。 接下來就可以去 GitLab 專案中查看。
查看 CI/CD 流程
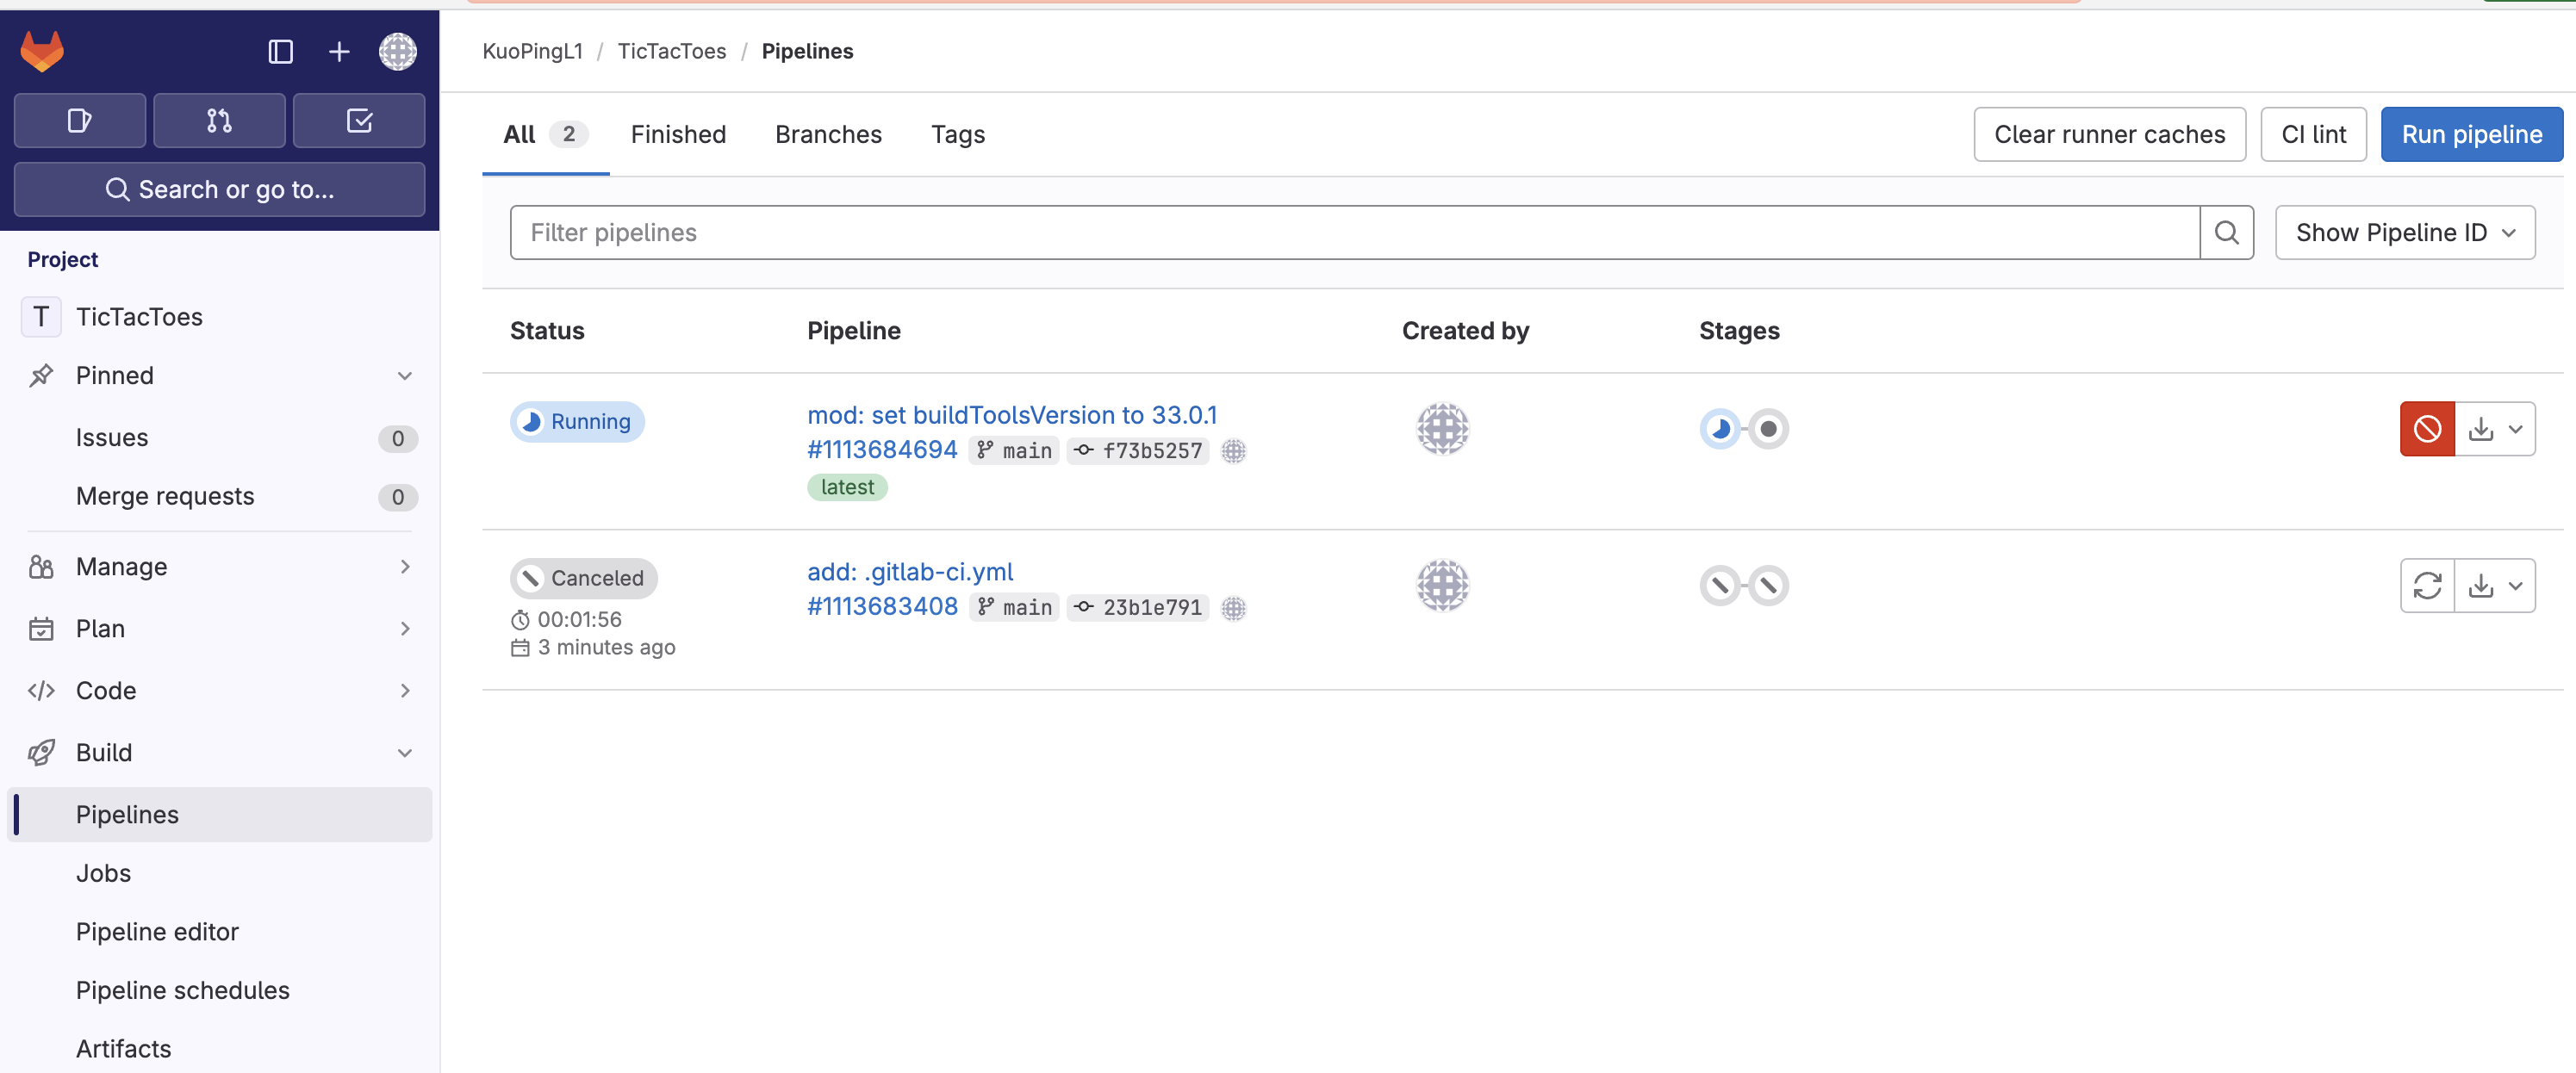
我們去 GitLab 上查看專案,並點擊側欄的 Build > Pipeline 你應該會看到 Running :
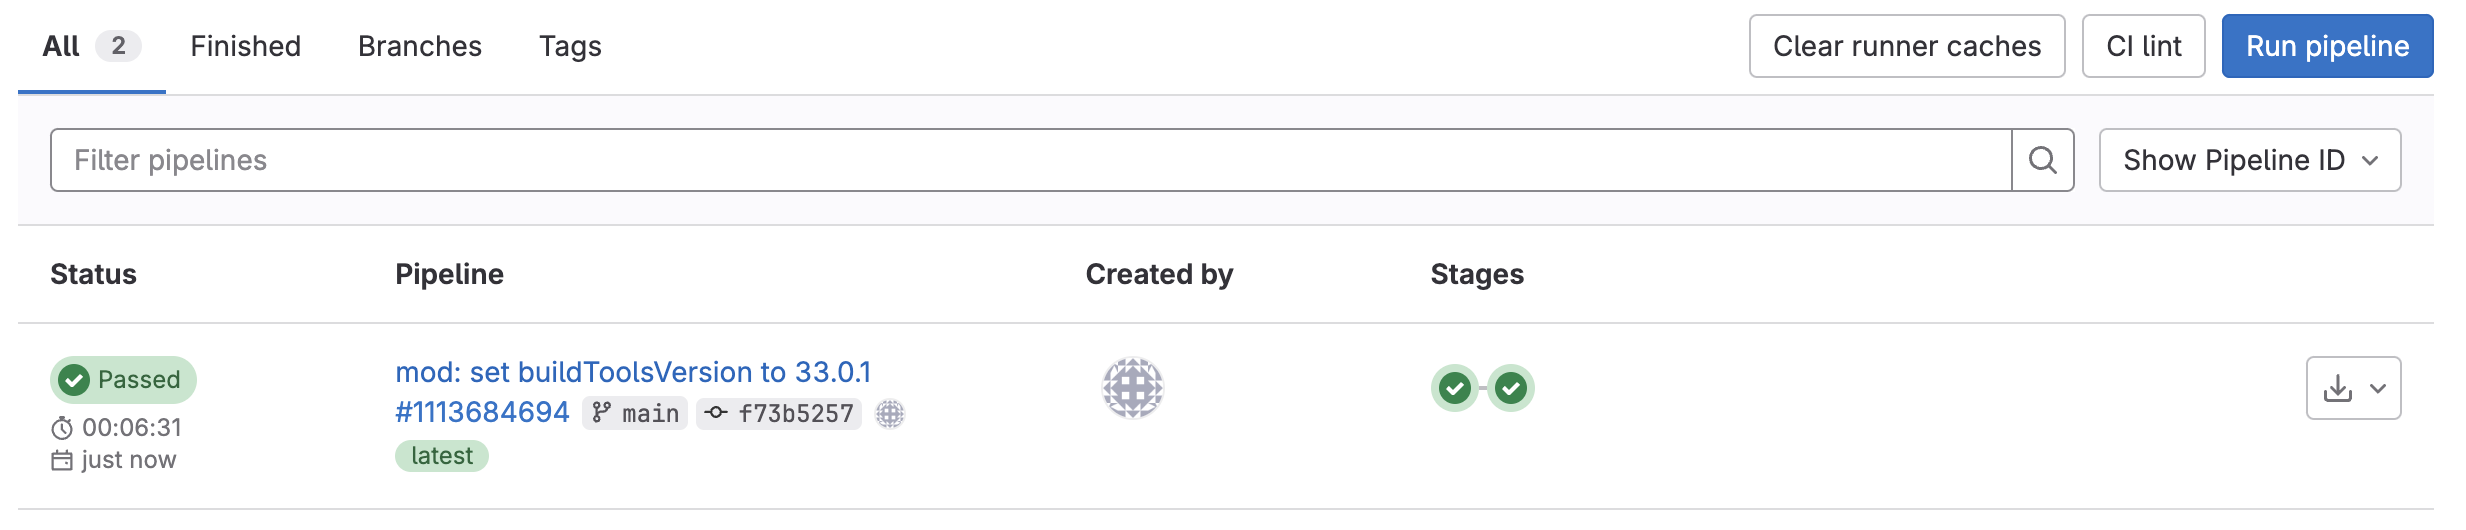
如果一切順利,最後就會看到 Passed :
如果我們點擊 Passed,他會顯示另一個畫面。 當中,我們可以看到以 stage 分類的 jobs。 而此時我們會有兩個 stages :
buildtest
而 build 又有兩個 job :
assembleDebuglintDebug
另外 test 則只有一個 job :
debugTest
這些 jobs 就是 yml 中定義的 :
lintDebug: ...
assembleDebug: ...
debugTests: ...
這頁面還可以顯示 jobs 之間的依賴關係 :
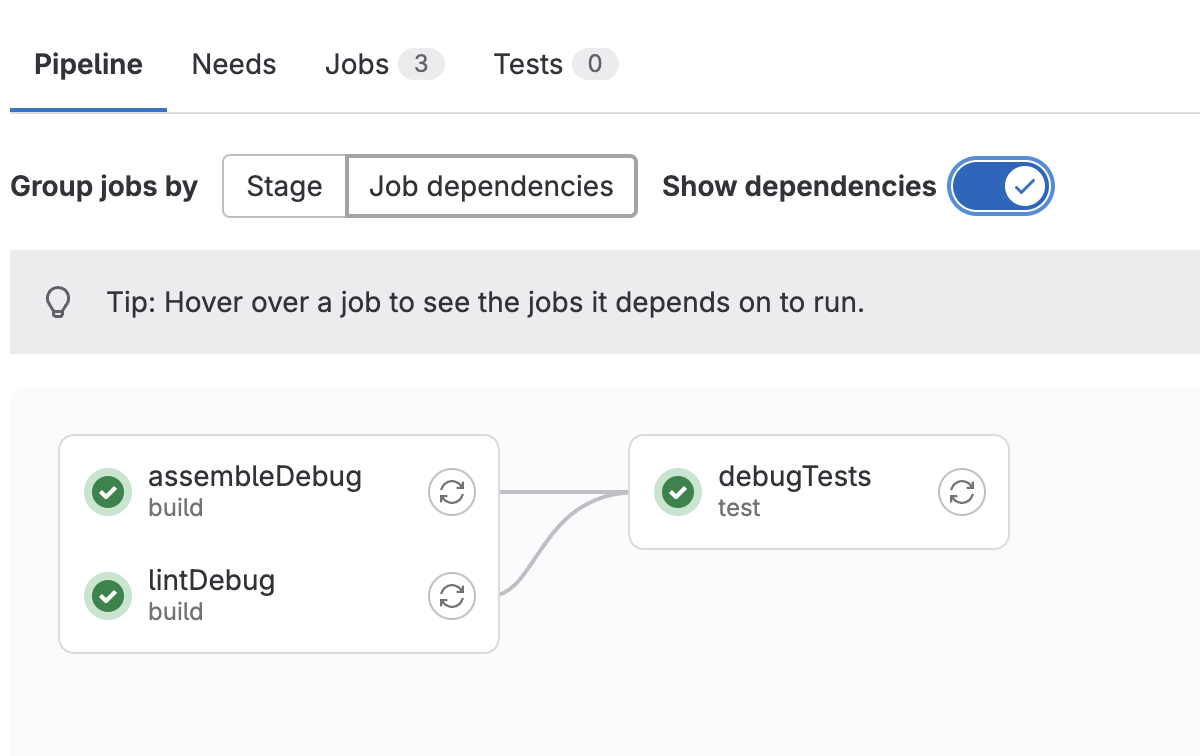
由此可見,debugTests 必須在 lintDebug 與 assembleDebug 完成後執行,就如同 yml 中的定義 :
debugTests:
  // 通過 needs 我們可以建立一個與 lintDebug 與 assembleDebug 相關的 DAG
  // https://about.gitlab.com/blog/2021/08/24/stageless-pipelines/
  needs: [lintDebug, assembleDebug]
  ...
預設中會有 5 種階段 :
.pre,build,test,deploy與.post。 而且會按這個順序執行。 當我們沒有指定 job 會在哪個階段進行時,他會被設為test。 如果我們設定在一個不存在的階段, CI/CD 就會失敗。
恭喜啊~你現在已經執行了你第一個 CI/CD 了。
解讀 yml
在我們的 yml 中,我們知道有以下部分 :
| 關鍵字 | 作用 |
|---|---|
image | Use Docker images. |
variables | Define CI/CD variables for all job in the pipeline. |
before_script | Override a set of commands that are executed before job. |
這些都是 GitLab 中定義的 關鍵詞。
接下來我們來解讀這些關鍵詞使用的作用吧。
解讀 image
所謂的 image 是一個負責創建 Docker Container 的唯讀的模板。
Image 與 Container 的關係就像是類別與物件的關係。
這裡使用的 image 是 eclipse-temurin:17-jdk-jammy。這是繼 OpenJdk 停止支援後建議的其中一個鏡面。
eclipse-temurin 其實有很多版本,這裡我們指定使用 17-jdk-jammy。 通過 eclipse-temurin 函式庫 我們可以看到 Image 會使用的全域變數 :
Tags: 17.0.9_9-jdk-jammy, 17-jdk-jammy, 17-jammy
SharedTags: 17.0.9_9-jdk, 17-jdk, 17
Architectures: amd64, arm32v7, arm64v8, ppc64le, s390x
GitCommit: f6d4923380ecb1ec4b0d58c633ebb0aeed4c8332
Directory: 17/jdk/ubuntu/jammy
然後可以在 Adoptium Containers 中找到 17/jdk/ubuntu/jammy。
Docker 便會透過 Dockerfile 進行系統設定、環境變數的修改、 OpenJdk 的安裝 與 entrypoint.sh 的運行。
entrypoint.sh 會有以下格式 :
set -e
... # code,這裡是更新 ca-certificates 並存放在 truststore 中。
exec "$@"
set -e會監聽腳本中的指令是否成功,一旦失敗就會退出。exec "$@"則會執行執行腳本之後所調用的方法。如果此方法是開啟新的進程 (程式),他便會取代目前的進程 (parent process)。
其中 exec "$@" 可以通過 以下範例 暸解 :
- 創建一個腳本 :
# script.sh exec "$@" - 在終端機運行腳本 :
shell > sh script.sh echo "hello" hello如果去掉exec "$@",hello就不會出現了。
所以 "$@" 其實就是輸入值,也就是 echo "hello"。
那為什麼需要取代父進程呢?
我們可以從這個 回應 中暸解,這個行為是為了讓 Container 能順利接收到 docker stop 所傳遞出來的 SIGTERM。
如果不通過 exec 啟動或創建 containers 時,這些訊號就需要由父進程接收、處理與傳遞。
而這個 回應 則說明有無 exec 時父子進程的關係。
解讀 variables
這裡我們只是設定了全域變數,所以沒什麼需要解讀的。
解讀 before_script
Override a set of commands that are executed before job.
這部分基本上就是進行 jobs 執行前的最後設定。 我們的範例中做了以下行為 :
- 更新系統中的 package
- 安裝
wget與unzip - 安裝
commandlinetools - 通過
sdkmanager安裝 Android 需要的build-tools和platform-tools - 確保我們對
./gradlew有執行權
# Packages installation before running script
before_script:
  #### 1. 更新 apt-get
  ## apt-get 是以 Debian 為基礎的 Linux 分發 (或發佈版本) 的套件管理員工具
  ## https://aws.amazon.com/tw/compare/the-difference-between-apt-and-apt-get/
  - apt-get --quiet update --yes

  #### 2. 安裝 wget 與 unzip
  ## wget 是讓我們可以進行網路通訊的,包括 HTTP, HTTPS 及 FTP (https://en.wikipedia.org/wiki/Wget)
  - apt-get --quiet install --yes wget unzip

  #### 3. 設定環境變數,在此位置創建新的資料夾
  # Setup path as android_home for moving/exporting the downloaded sdk into it
  - export ANDROID_HOME="${PWD}/android-sdk-root"
  # Create a new directory at specified location
  - install -d $ANDROID_HOME

  #### 4. 通過 wget 取得 command line tool 、解包、通過 mv -T 將 cmdline-tools 改為 tools 資料夾, 最後更新環境變數。
  ## mv -T 的作用可以看 https://www.gnu.org/software/coreutils/manual/html_node/Target-directory.html
  # Here we are installing androidSDK tools from official source,
  # (the key thing here is the url from where you are downloading these sdk tool for command line, so please do note this url pattern there and here as well)
  # after that unzipping those tools and
  # then running a series of SDK manager commands to install necessary android SDK packages that'll allow the app to build
  - wget --no-verbose --output-document=$ANDROID_HOME/cmdline-tools.zip https://dl.google.com/android/repository/commandlinetools-linux-${ANDROID_SDK_TOOLS}_latest.zip
  - unzip -q -d "$ANDROID_HOME/cmdline-tools" "$ANDROID_HOME/cmdline-tools.zip"
  - mv -T "$ANDROID_HOME/cmdline-tools/cmdline-tools" "$ANDROID_HOME/cmdline-tools/tools"
  - export PATH=$PATH:$ANDROID_HOME/cmdline-tools/latest/bin:$ANDROID_HOME/cmdline-tools/tools/bin

  #### 5. 檢查 sdkmanager 並安裝不同的 packages
  ## https://developer.android.com/tools/sdkmanager#install
  # Nothing fancy here, just checking sdkManager version
  - sdkmanager --version

  # use yes to accept all licenses
  - yes | sdkmanager --licenses > /dev/null || true
  - sdkmanager "platforms;android-${ANDROID_COMPILE_SDK}"
  - sdkmanager "platform-tools"
  - sdkmanager "build-tools;${ANDROID_BUILD_TOOLS}"

  #### 6. 確保我們對 gradlew 有執行權
  # Not necessary, but just for surity
  - chmod +x ./gradlew
解讀 jobs
這裡我們只能透過 job 關鍵字 來暸解他們都做了什麼。
lintDebug:
  # 設定可被停止
  interruptible: true
  # 指定執行階段
  stage: build
  # 定義行為
  script:
    # -pci 會追蹤 bug 並以 html 或 xml 記錄起來 (https://github.com/paulbakker/configuration-example/blob/master/cnf/gradle/doc/BUILDING-GRADLE.md#findbugs-2)
    # -PbuildDir 設定 build directory 為 lint 資料夾。 (https://stackoverflow.com/questions/23008485/change-gradle-build-directory-in-android-studio)
    # 執行 :app:lintDebug Task
    - ./gradlew -Pci --console=plain :app:lintDebug -PbuildDir=lint
  # 設定產物
  artifacts:
    paths:
      # 如果有錯誤,我們便可在這 html 檔案中得知原因
      - app/lint/reports/lint-results-debug.html
    # lint-results-debug.html 在 Merge Request 畫面中會以 lint-report 名稱呈現
    expose_as: "lint-report"
    # 設定什麼狀態下執行這個 job (https://docs.gitlab.com/ee/ci/yaml/#when)
    # 預設是 on_success (前面的 job 成功才會跑)
    when: always

# Make Project
assembleDebug:
  interruptible: true
  stage: build
  script:
    - ./gradlew assembleDebug
  artifacts:
    paths:
      - app/build/outputs/

# Run all tests, if any fails, interrupt the pipeline(fail it)
debugTests:
  # https://docs.gitlab.com/ee/ci/yaml/#needs
  # 按順序執行當中的 jobs,並在這些 jobs 都完成後才會執行這個 job
  needs: [lintDebug, assembleDebug]
  interruptible: true
  stage: test
  script:
    - ./gradlew -Pci --console=plain :app:testDebug
目前我們只是使用 GitLab 提供的模板,之後在開法過程便會漸漸改變。
為什麼 GitLab 可以進行 CI/CD ?
我相信你也有這個問題吧? 是吧? … 只有我嗎? … 好吧。
其實是因為 GitLab 也是通過 Docker 來進行 CI/CD 的。 我們可以在 Pipeline 執行後的 Artifacts 中看出來 :
Running with gitlab-runner 16.6.0~beta.105.gd2263193 (d2263193)
  on blue-4.saas-linux-small-amd64.runners-manager.gitlab.com/default J2nyww-s, system ID: s_cf1798852952
  feature flags: FF_USE_IMPROVED_URL_MASKING:true

# 設定 Docker 並下載 Image
Preparing the "docker+machine" executor
00:10
Using Docker executor with image eclipse-temurin:17-jdk-jammy ...
Pulling docker image eclipse-temurin:17-jdk-jammy ...
Using docker image sha256:b97bd7dd6cbd993d1779abf824abc6445509e3294d9a4f26e217478bd3c10dc6 for eclipse-temurin:17-jdk-jammy with digest eclipse-temurin@sha256:d87a5e63a3d0cc562a8c9207328311d72f9aaf8948b5ee082acf4c1e015835b5 ...
等之後開始暸解 Docker 時再探討其命令的含義吧。
但在此之前,你們有注意到在 Docker 之前的那行嗎?
gitlab-runner 又是什麼呢?
GitLab Runner is an application that works with GitLab CI/CD to run jobs in a pipeline.
如果我們使用的是 GitLab.com,我們可以使用 GitLab 預設的 GitLab Runner。 當然,我們還是可以自訂,這也是接觸後會再提。
總結
CI/CD 是由多個 Pipeline 來定義行為。 而每個 Pipeline 則會由多個 Job 來定義細節。 這些 Pipeline 之後會由 GitLab Runner 來執行。 而執行 Pipeline 所需要的環境與系統則是由 Docker 提供。
雖然這篇只提到如何使用 GitLab 提供的模板 CI/CD 設定以及解釋指令的作用。 但這些都是之後使用其他工具的墊腳石。
希望大家都能再接再厲,一同學會 GitLab 與多個平台和工具的 CI/CD 吧。
加油 ~~~
Reference
About Post
- Author:Jimmy Liu
- Link:https://kuopingl.github.io//2023/12/21/first-experience-with-cicd-in-gitlab-for-android/
- Copyright:Free to share and adapt, but remember to give proper credit(CC BY-SA 3.0)